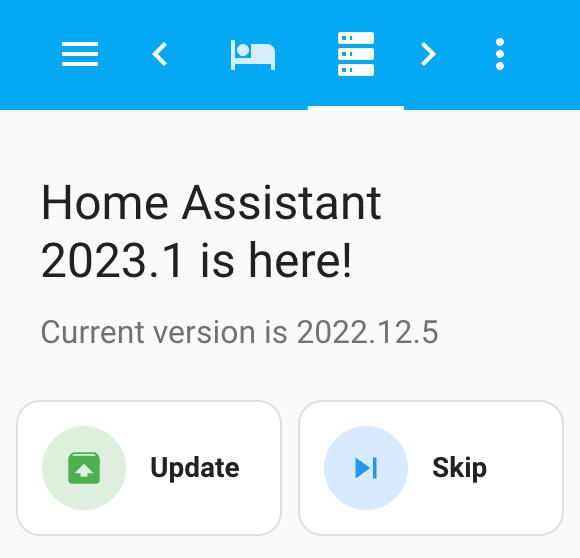
Updating Home Assistant in Docker from Lovelace UI just like in Home Assistant OS

The Docker installation method becomes very popular among Home Assistant users. One of the downsides of the Docker installation method is the absence of update notifications and updates with a single button click. Today we will try to fix this with the power of Named Pipes (Whaaat??).
Disclaimer. This is a little bit of an advanced and not the best solution, but it shows an example of how you could access the host system without providing a full docker socket inside the container or running the Home Assistant container in a privileged mode. You could always use Portainer or Watchtower to do the same things without writing any scripts. Or look into a Supervised install.

So, what the hell is Named Pipes? It is a concept of inter-process communication in Unix-like operating systems. I’m gonna use my Debian home server for this “experiment”, but this method should work on any GNU/Linux and maybe even on macOS (not sure about that).
1. Creating named pipe
First, let’s create a named pipe on our home server. You can do this with the next command:
mkfifo /root/pipes/hapipe
/root/pipes/hapipe – is a path and a name of your future named pipe.
Now, we need to create a bash script that will start listening to commands from our named pipe. I’ve created a /root/scripts/hapipe_listener.sh with the next content:
#!/bin/bash
while true; do eval "$(cat /root/pipes/hapipe)"; done
And made it executable:
chmod +x /root/scripts/hapipe_listener.sh
Also, we need to make sure the listener will work even after the host restart, so we should edit our crontab with:
crontab -e
And add the next line to it:
@reboot /root/scripts/hapipe_listener.sh
2. Testing named pipe
Now we can test if it works. We could temporarily edit our /root/scripts/hapipe_listener.sh to write any commands output to a file. We even could do it permanently to have some log of our pipe commands:
#!/bin/bash
while true; do eval "$(cat /root/pipes/hapipe)" &> /root/logs/hapipe.log; done
You can reboot your server with a simple reboot command and then put some commands into your pipe. For example:
echo "ls -l" > /root/pipes/hapipe
I’ve got an output into a /root/logs/hapipe.log of an ls command, so it works for me:
total 40
-rw-r--r-- 1 root root 1897 Jan 10 13:37 docker-compose.yaml
drwxr-xr-x 3 root root 4096 Dec 30 20:41 esphome
drwxr-xr-x 4 root root 4096 Dec 30 20:42 homeassistant
drwxr-xr-x 4 root root 4096 Jan  6 18:25 homepage
drwxr-xr-x 2 root root 4096 Jan 14 12:52 logs
drwxr-xr-x 5 1883 1883 4096 Dec 30 20:51 mosquitto
drwxr-xr-x 2 root root 4096 Jan 14 11:33 pipes
drwxr-xr-x 2 root root 4096 Jan 14 11:35 scripts
drwxr-xr-x 3 root root 4096 Jan  6 18:42 tmp
drwxr-xr-x 3 root root 4096 Dec 30 20:42 zigbee2mqtt
3. Home Assistant docker update script
You already can see, where are we moving, right? Let’s create another script on our host at /root/scripts/ha_update.sh with the next content:
#!/bin/bash
docker compose -f /root/docker-compose.yaml pull homeassistant &> /root/logs/ha_pull.log

docker compose -f /root/docker-compose.yaml up -d homeassistant &> /root/logs/ha_up.log
/root/docker-compose.yaml is a path to my docker-compose.yaml where homeassistant is defined as service. You can see an example here. The first command will pull the latest image, and the second one will re-create the docker container with the new image.
4. Adding named pipe to Docker
Now we need to make our named pipe available in the Home Assistant Docker container. We can do this by adding a new volume for homeassistant service in our docker-compose.yaml:
    volumes:
      ...
      - /root/pipes/hapipe:/hostpipe
To make things work, we need to re-create a container with
docker compose up -d homeassistant
5. Executing host commands from Home Assistant
Now we can write commands to a named pipe in Home Assistant container and they would be executed on a host. We could do this with Shell command integration. Let’s test our pipe by adding this to a configuration.yaml and restarting our Home Assistant:
shell_command:
  test_host_pipe: echo "ls -l" > /hostpipe
Then go to the Developer Tools > Services and try to call our newly created test_host_pipe service:

We should be able to see the output of ls -l command in our host’s /root/logs/hapipe.log:
total 40
-rw-r--r-- 1 root root 1934 Jan 14 13:07 docker-compose.yaml
drwxr-xr-x 3 root root 4096 Dec 30 20:41 esphome
drwxr-xr-x 4 root root 4096 Dec 30 20:42 homeassistant
drwxr-xr-x 4 root root 4096 Jan  6 18:25 homepage
drwxr-xr-x 2 root root 4096 Jan 14 12:52 logs
drwxr-xr-x 5 1883 1883 4096 Dec 30 20:51 mosquitto
drwxr-xr-x 2 root root 4096 Jan 14 11:33 pipes
drwxr-xr-x 2 root root 4096 Jan 14 12:57 scripts
drwxr-xr-x 3 root root 4096 Jan  6 18:42 tmp
drwxr-xr-x 3 root root 4096 Dec 30 20:42 zigbee2mqtt
It means that now we could create another service that will call our previously created ha_update.sh script on a host. Let’s do this by updating configuration.yaml again:
shell_command:
  test_host_pipe: echo "ls -l" > /hostpipe
  ha_update: echo "/root/scripts/ha_update.sh" > /hostpipe
After Home Assistant restart we could call that service from Developer Tools > Services and if there is a new image available for Home Assistant, this will result in an update and restart of our Home Assistant instance:

We could check the result on our host in /root/logs/ha_up.log. It should look something like this:
Container mariadb  Running
Container homeassistant  Recreate
Container homeassistant  Recreated
Container homeassistant  Starting
Container homeassistant  Started
6. Tracking Home Assistant versions and automating
6.1 Versions tracking
The job is almost done. You could create a button now in your Lovelace UI to call the update service. Just don’t forget to use confirmation for it. Just in case.
But I also want to be notified when there is an update available and start the update process right from the notification. I also want to be able to skip certain versions. So let’s do this.
First, we need to create a helper to store the version we want to skip. Go to Settings > Devices & Services > Helpers tab, click Create Helper and choose “Text”:

Next, to track current and available versions, we will use Version integration. From Settings > Devices & Services > Integrations tab click Add Integration, and search for “Version”:

Select “Home Assistant Versions” as the Version source and then choose to track generic image from stable channel:


The image and board values depend on the platform you are using. I’m running on an x86-64 Intell Nuc, so I want to track the corresponding images.
Then, we need to track our current version as well, so once again from Settings > Devices & Services > Integrations tab click Add Integration, and search for “Version”. Then choose “Local installation”:

At last, we also need to add a Version integration with the “Home Assistant Website” source, because the sensor from this integration will have a release_notes attribute with the link to release notes. We couldn’t use the “Home Assistant Website” source for the new version check, because sometimes the new version on the site could be already announced, but the image for your platform could be not ready yet.
We now have three instances of Version integration set up:

Now let’s create automation.
6.3 Automation UI
6.3.1 Triggers
For triggers, I choose to use the Home Assistant version state change,

Home Assistant start:

And the time trigger for every day at 8:00 in case I dismissed all notifications by accident and forgot about the new version:

I also added triggers to handle both notification actions:


6.3.2 Actions
Then, in the actions, I have a single Choose block with four options.
The first option checks trigger ids and make sure that we have a new version and not the “Unavailable” state of a sensor. It also checks if current version is not the one we want to skip:


Here is a code of both templates:
{{states('sensor.home_assistant_versions') != states('input_text.home_assistant_version_skip')}}
{{states('sensor.home_assistant_versions') != states('sensor.current_version')}}

And fires two notifications. One is for my mobile phone, and the second – is a persistent one to display in HA UI. Here is the YAML code, of both actions because it has templates:
data:
  title: Update available
  message: >-
    New Home Assistant version available:
    {{states('sensor.home_assistant_versions')}}. Current version:
    {{states('sensor.current_version')}}
  data:
    tag: ha_updates
    group: server
    actions:
      - action: URI
        title: Release notes
        uri: "{{state_attr('sensor.home_assistant_website', 'release_notes')}}"
      - action: update_ha
        title: Update
      - action: skip_ha_release
        title: Skip
service: notify.mobile_app_sm_g996b
We need a tag here to clear the notification later.
service: persistent_notification.create
data:
  title: Update available
  message: >-
    New Home Assistant version available:
    {{states('sensor.home_assistant_versions')}}. Current version:
    {{states('sensor.current_version')}}
  notification_id: ha_updates
notification_id here is also for clearing the notification.
The second option is for removing the notifications. It checks whether the automation was triggered by Home Assistant start and compares current and available versions:

Template condition YAML:
{{states('sensor.home_assistant_versions') == states('sensor.current_version')}}
Removes the persistent notification:

And the notification on my mobile phone:

The third option is simple but most important – the UPDATE:

It also removes the persistent notification. The mobile notification will be removed automatically by clicking “Update” on it.
And the fourth option is for remembering the release we want to skip and removing the persistent notification as well.

6.4 Automation YAML
Here is a full YAML for the automation:
alias: "Update :: HA"
description: ""
trigger:
  - entity_id:
      - sensor.home_assistant_versions
    platform: state
    id: haWebsiteVersionChange
  - platform: homeassistant
    event: start
    id: haStart
  - platform: event
    event_type: mobile_app_notification_action
    event_data:
      action: skip_ha_release
    id: skipRelease
  - platform: time
    at: "08:00:00"
    id: time
  - platform: event
    event_type: mobile_app_notification_action
    event_data:
      action: update_ha
    id: update
condition: []
action:
  - choose:
      - conditions:
          - condition: or
            conditions:
              - condition: trigger
                id: haWebsiteVersionChange
              - condition: trigger
                id: haStart
              - condition: trigger
                id: time
          - condition: template
            value_template: >-
              {{states('sensor.home_assistant_versions') !=
              states('input_text.home_assistant_version_skip')}}
          - condition: template
            value_template: >-
              {{states('sensor.home_assistant_versions') !=
              states('sensor.current_version')}}
          - condition: not
            conditions:
              - condition: state
                entity_id: sensor.home_assistant_versions
                state: unavailable
              - condition: state
                entity_id: sensor.home_assistant_versions
                state: unknown
        sequence:
          - data:
              title: Update available
              message: >-
                New Home Assistant version available:
                {{states('sensor.home_assistant_versions')}}. Current version:
                {{states('sensor.current_version')}}
              data:
                tag: ha_updates
                group: server
                actions:
                  - action: URI
                    title: Release notes
                    uri: >-
                      {{state_attr('sensor.home_assistant_website',
                      'release_notes')}}
                  - action: update_ha
                    title: Оновити
                  - action: skip_ha_release
                    title: Пропустити
            service: notify.mobile_app_sm_g996b
          - service: persistent_notification.create
            data:
              title: Update available
              message: >-
                New Home Assistant version available:
                {{states('sensor.home_assistant_versions')}}. Current
                version:     {{states('sensor.current_version')}}
              notification_id: ha_updates
      - conditions:
          - condition: trigger
            id: haStart
          - condition: template
            value_template: >-
              {{states('sensor.home_assistant_versions') ==
              states('sensor.current_version')}}
        sequence:
          - service: persistent_notification.dismiss
            data:
              notification_id: ha_updates
          - service: notify.mobile_app_sm_g996b
            data:
              message: clear_notification
              data:
                tag: ha_updates
      - conditions:
          - condition: trigger
            id: update
        sequence:
          - service: shell_command.ha_update
            data: {}
          - service: persistent_notification.dismiss
            data:
              notification_id: ha_updates
      - conditions:
          - condition: trigger
            id: skipRelease
        sequence:
          - service: input_text.set_value
            data:
              value: "{{states('sensor.home_assistant_website')}}"
            target:
              entity_id: input_text.home_assistant_version_skip
          - service: persistent_notification.dismiss
            data:
              notification_id: ha_updates
mode: queued
max: 10
Enjoy!


