Monitor USB UPS connected to Synology NAS in Home Assistant

There is a lot of automation you can do with this data, but today I want to write up a short guide on how to safely get the information from the UPS connected to your NAS via USB into the Home Assistant.
NAS user and permissions
First of all, let's create a separate user with minimum permissions. In your Synology DSM, go to Control Panel -> User & Group -> Create:
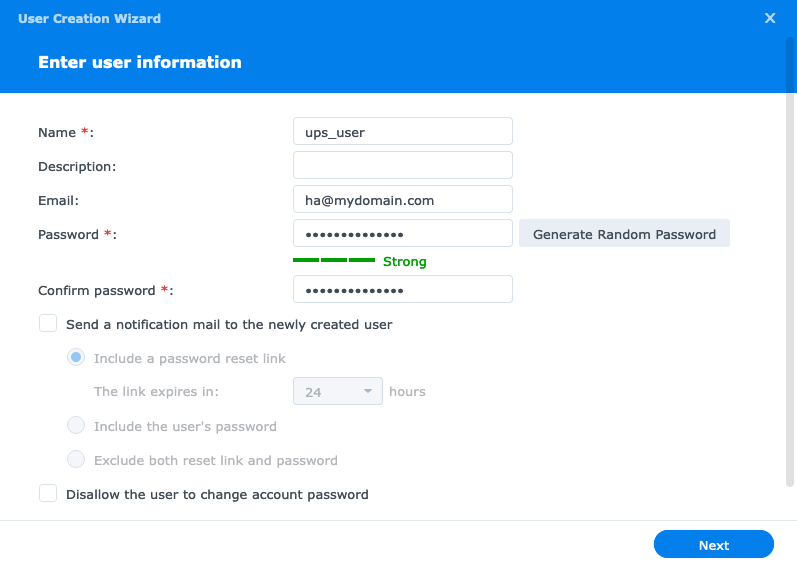
Write down the username and password for it to use in Home Assistant later.
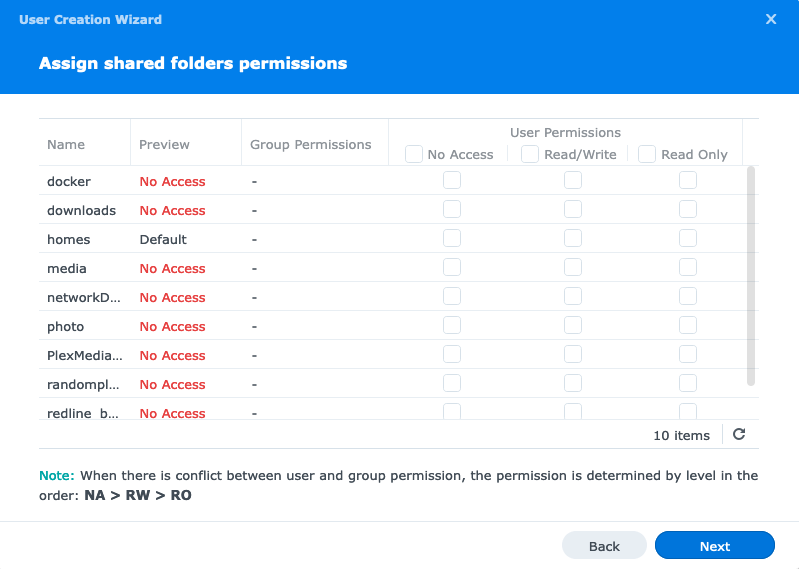
Don't change folder permissions or explicitly set "No Acces" for all folders:
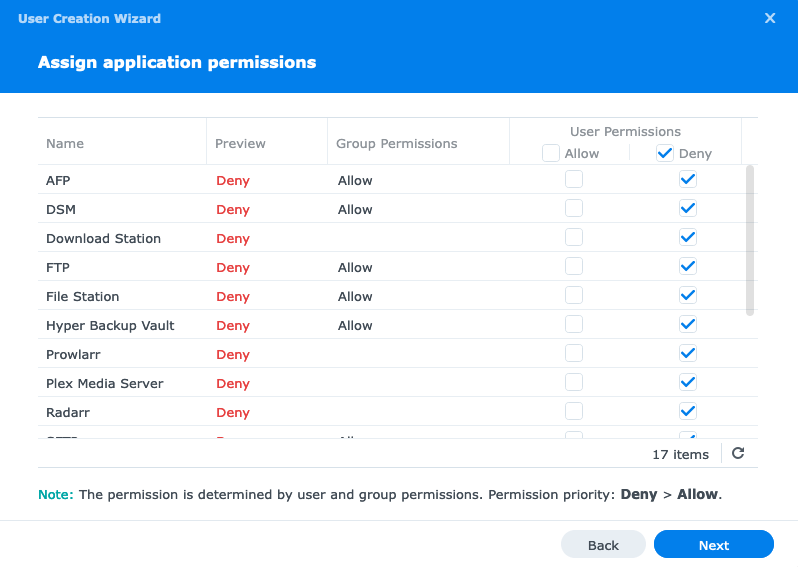
On the User quota step don't set any, and deny using all applications for him:
UPS server
Now we need to enable Synology NAS UPS server that will allow other machines to get UPS information over the local network. In your Synology DSM go to Control Panel -> Hardware & Power -> UPS tab. Here you can set up a UPS connected to your NAS via USB (or via SNMP protocol if you have enterprise-grade UPS for data centers). Assuming you did that, it is time to enable the UPS server by checking the "Enable network UPS server" checkbox.
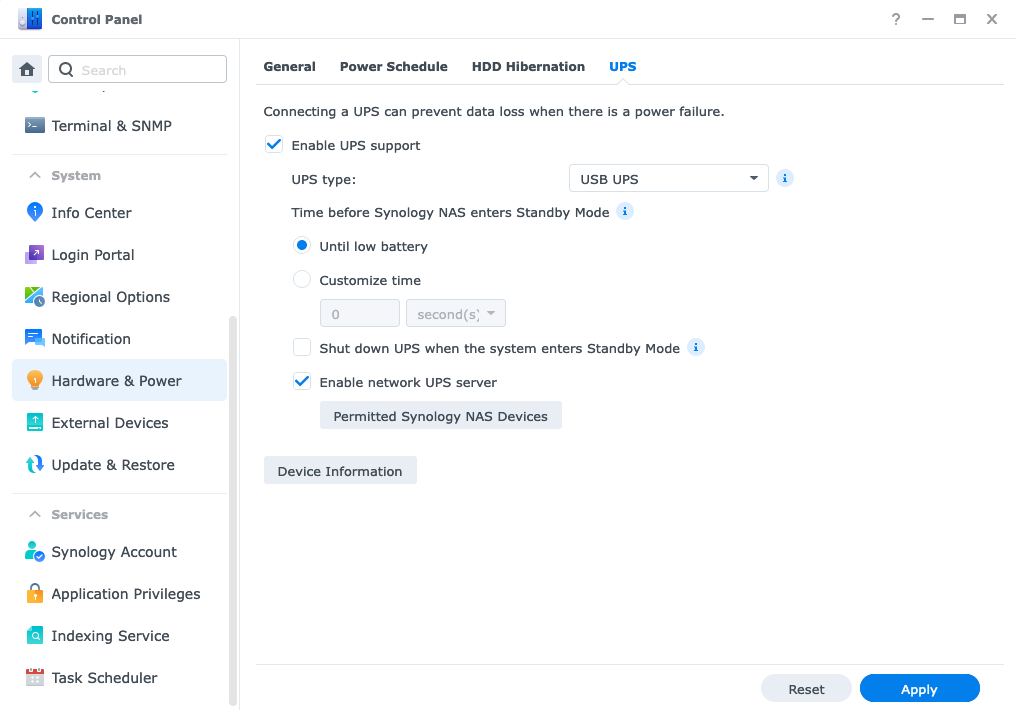
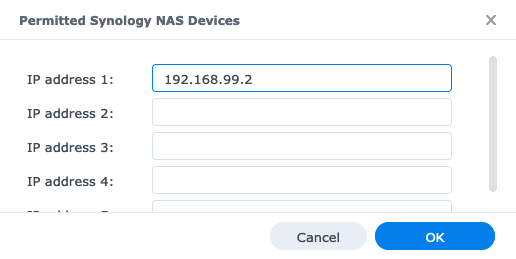
Also, you need to click the "Permitted Synology NAS Devices" button and add your Home Assistant local IP address there:
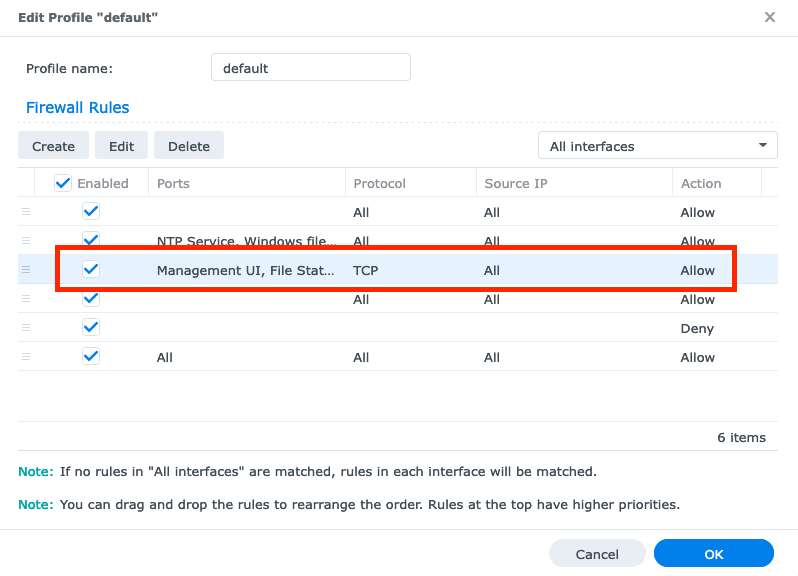
After that, you need to make sure the port for the UPS server is open in the firewall on your NAS. Go to Control Panel -> Security -> Firewall tab and click the "Edit rules" button. Here you need to edit an existing rule for the TCP protocol that has a list of apps in the Ports column:
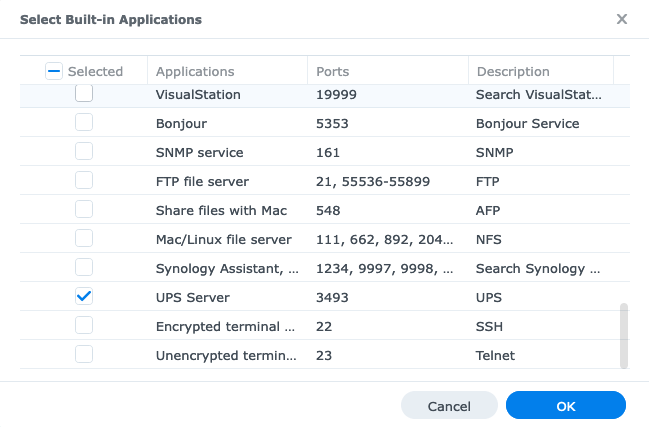
In the editing window click the Select button near "Select from a list of built-in applications" and make sure the UPS server is selected:
Home Assistant integration
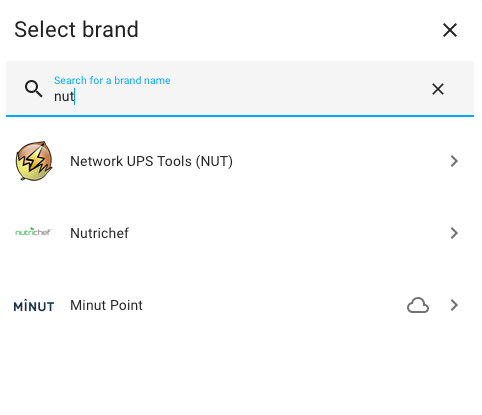
The integration that will allow us to connect to the UPS server on Synology NAS is Network UPS Tools.
In your Home Assistant go to Settings -> Devices & services and click the "Add integration" button. Search for "nut" there and choose "Network UPS Tools (NUT)".
In the configuration window that appeared you need to set your NAS's local IP address as a Host, leave the Port number unchanged, and use the username and password of your newly created NAS user:
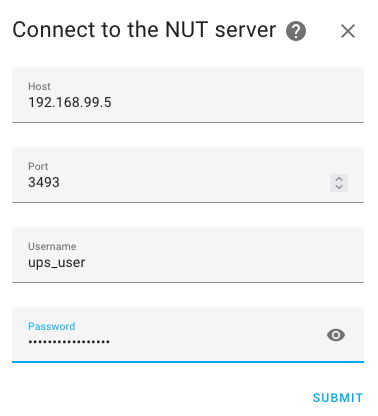
Hit Submit and you are done.


